
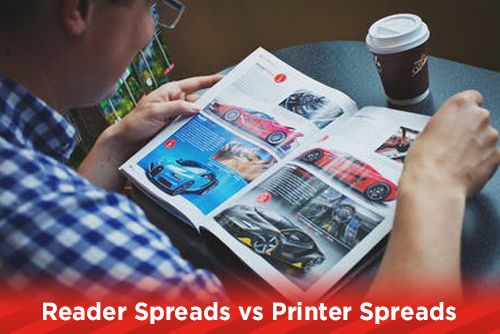
What are Reader Spreads?
Picture holding a book or magazine in your hands. As you flip through the pages you can see both left hand and right hand pages at the same time. When you are designing a multi-page book in InDesign or another page layout program, and you have your layout set for facing pages, you will see the left hand and right hand pages side by side. This is considered a "reader spread".
What are Printer Spreads?
In printing, we will take a multi-page 8.5x11 book and print it as an eight page signature (some print companies with larger sized presses can do sixteen page signatures). These signatures will either be nested within each other for saddle stitch books, or stacked on top of each other for perfect bound books. For this example, we will assume the book is a sixteen page saddle stitch book. Your first signature will have pages sixteen and one on the left hand side of the front of the signature with the head direction facing right, and pages four and thirteen on the right hand side of the front of the signature with the head direction facing left. These pages, sixteen and one, and four and five are called the "printer spread". On the backside of the signature, you will find pages three and fourteen on the left hand side, with two and fifteen on the right hand side. Once the signature is printed, it will be folded in half horizontally first, then folded vertically off center leaving more paper on the tail of the sheet for the stitching machine.
Click here to see a visual guide on reader spreads and printer spreads.
Should I Design My Files as Reader Spreads or Printer Spreads?
Anytime you are designing a multi-page book project to be sent to a commercial printing company, your pages should always be designed as single facing pages. This will allow you to be able to view your crossovers (images or graphics that cross from the left hand page to the righ hand page) a well as seeing how the two pages look together. If you designed your file as single pages only and not facing pages, you would not be able to tell if your crossovers were aligned properly.
Never set up your document to be a spread (an 8.5x11 size page would equal an 11x17 spread), or export your final high resolution pdf file as a spread. Doing this will require extra time and work on your file, so it can be set up into single pages by the prepress department of the printing company.
What About Calendars?
Calendars are a little different in that the layout is vertical instead of horizontal. There are a few options that you can choose when setting up your pages for a calendar layout. Setting up your page layout as an 11x17 page would allow you to design the calendar as a "reader spread" where you are viewing both top and bottom pages. The trouble with this layout is you need the top and bottom pages separated for impositioning. As a designer, you won't have to deal with impositioning, but it will take a few more steps at the printing company and could incur more prepress time. For the prepress department, they will take you high resolution 11x17 pdf spread, place it in an 8.5x11 facing page document, rotate it 90 degrees and center it within the spread.
Another option is to create single pages at 11x8.5 without facing pages. Then you can place your graphic or image that goes on the top page of the spread on one page, and the monthly text that goes on the bottom of the spread on the next page. A problem with this layout is you will not be able to control your crossovers easily, and have the chance of misaligned graphics from the top page to the bottom.
The final option allows you to have single facing pages and be able to see your crossovers as you design the pages in InDesign. First, create your layout with the appropriate number of pages for your calendar. Remember for a saddle stitch book, your pages must be divisible by four (i.e., 8, 12, 16, 20, etc.). Once you have all of your pages, right click or control click a page icon in the pages panel, choose Page Attributes, Rotate Page View and choose 90 degree CW. This will rotate the way you are viewing the spreads allowing you to design your calendar as you would view it. When you export your pdf, your pages will not be rotated allowing the prepress department of the print company to imposition your file easily.
Print Booklet in InDesign
Once you have finished your layout and design, you should print your document to see how it all fits together. You can print single pages and tape them together in the order that they go. Or if you want to see how the spreads will print on a press, you can choose Print Booklet in InDesign. Once you choose Print Booklet, you can choose 2-up Saddle Stitch under Booklet Type. Next, choose Print Settings and select your page size. If you only have 8.5x11 paper, you can shrink to fit, or choose tabloid to print the spreads at 100%. Now your page will print as printer spreads and you will be able to fold the paper in half to view your design. Printing in this manner allows you to see if any pages need to be rotated or adjusted.
However you choose to set up your design, your final high resolution pdf file that is to be sent to the printing company, needs to be single pages with bleeds and crop marks. Unless the printing company tells you otherwise, allow them to set up their imposition using the equipment they have. Any deviation from what they require will add more time and expense to your project.
Would you like more helpful print related articles sent to your inbox? Subscribe to our mailing list and receive our bi-weekly article posts every Tuesday and Thursday.