

What is bleed in printing?
If you design for digital (web graphics, or pieces that do not print) you may not be familiar with the term “bleed.” In offset and digital printing, bleed is the amount of area your graphics or images extend past the edge of the page to make sure there is no white border showing once the piece is cut. Having your graphics go beyond the page area allows for imperfections when cutting the job, such as movement on the cutter or misaligned pages.
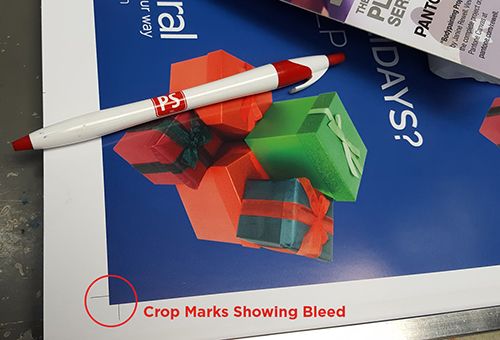
Everything you design or layout that needs to go to a printing company should have bleed added to it. Along with bleeds, there needs to be trim marks added to the outside of the bleed area. These marks show bindery cutter operators where to trim the job.
How much bleed should you add?
Your graphics or images should bleed at the least 0.125” outside of the document final size, but 0.25” is ideal. When you create your document, make it the final size of your piece (8.5x11 for letter size, 3.5x2 for business card, etc.) and as you design the work, extend graphics and images past the edge of the document. Never set up your document larger than the final size of your output (8.75x11.25 for letter, 3.75x2.25 for business card, etc.). This causes trouble with crossovers and other areas for printers.
Bleeds should always be added around all 4 edges of your piece, including perfect bound or spiral bound books, unless the final piece is saddle stitch. Saddle stitch books do not need bleeds in the center areas, or crease, of the book.
Full bleed vs no bleed.
Sometimes, bleeds can be confusing to know where to add or where not to add. As always, if you have questions or need direction, do not hesitate to contact us. We are here to assist you in making your project the best it can be.
For an easy to use guide, download this Bleeds for Print Media pdf.
Stay up to date by subscribing to our mailing list.